Photoshop转矢量素材为一块玉
时间:2023/9/18作者:未知来源:手揣网教程人气:
- [摘要]本Photoshop教程主要是利用一些简单的花纹素材图片制作漂亮的玉雕效果。制作的时候需要一点美术功底,能够表现玉的浮雕效果,新手可能比较费时间!最终效果素材副标题1.首先当然是启动PS,哈。 2....本Photoshop教程主要是利用一些简单的花纹素材图片制作漂亮的玉雕效果。制作的时候需要一点美术功底,能够表现玉的浮雕效果,新手可能比较费时间! 最终效果 素材 副标题 1.首先当然是启动PS,哈。 2.执行:文件-〉新建 如图。 3.打 本Photoshop教程主要是利用一些简单的花纹素材图片制作漂亮的玉雕效果。制作的时候需要一点美术功底,能够表现玉的浮雕效果,新手可能比较费时间!
最终效果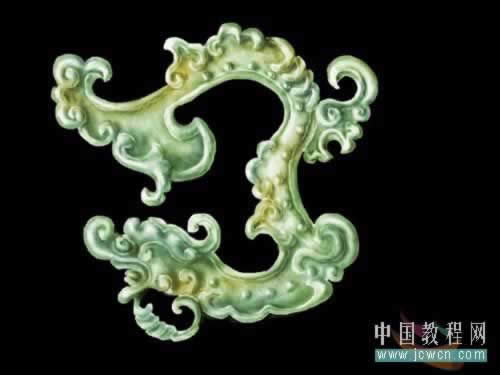
素材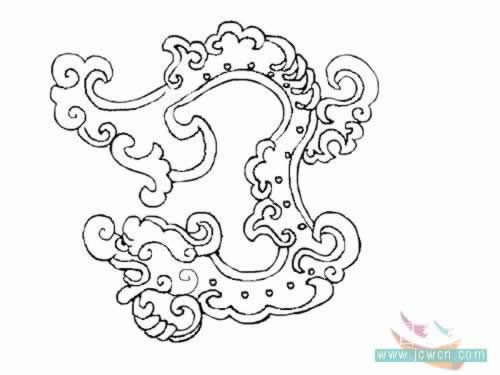
1.首先当然是启动PS,哈。
2.执行:文件-〉新建 如图。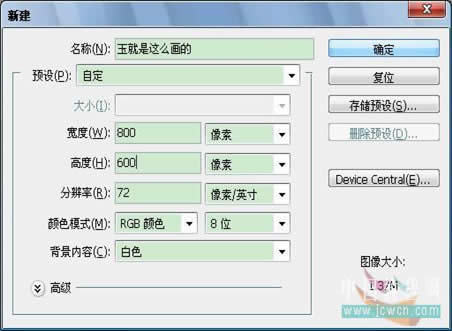
3.打开素材图,拖到文件中,稍加处理(根据实际情况)。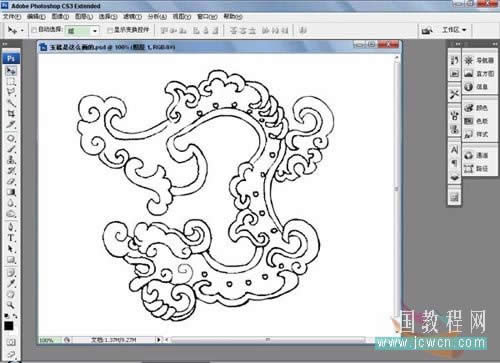
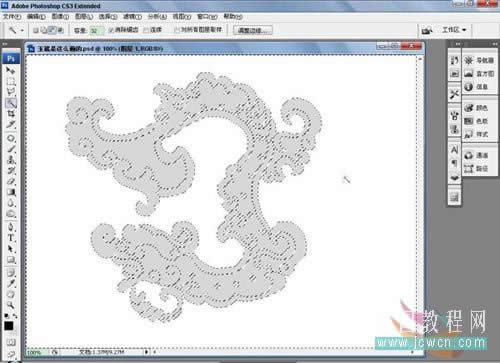
4.为了填充基本颜色,所以新建一层,用魔棒按钮选择图案中纹理的空白部分 ,填充灰色#D7D7D7,如图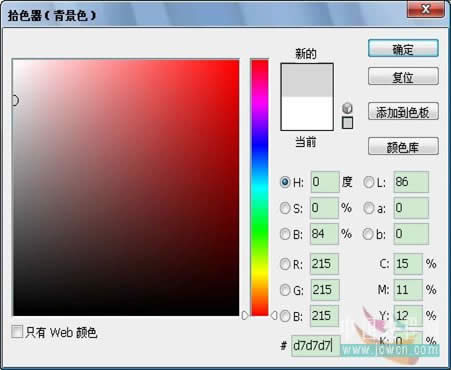
魔棒工具,选取。简单完成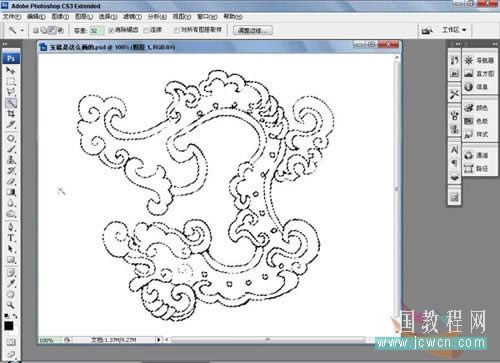
5.为了绘制明暗部分,保留选区,执行:选择-〉羽化 输入数值为1,然后设置前景色为黑色,用画笔工具,并设置画笔的状态,然后绘制明暗效果,如图。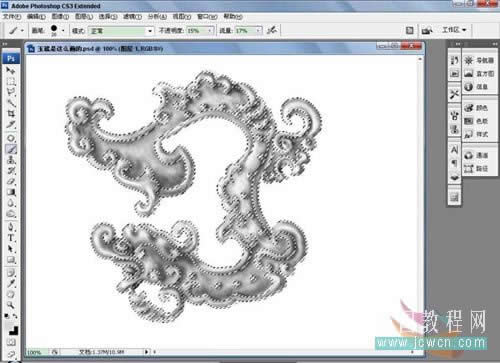
6.再次深入刻画,不断设置画笔,进行深入的刻画。
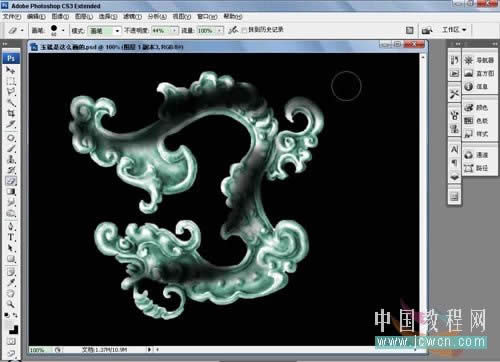
7.调整图案,对保留下来的空白的轮廓线调整,将高光的部分画上白色,将阴影的部分画上稍微浅的灰色,作为反光,用涂抹工具把明暗过渡一下(注意涂抹要自然)。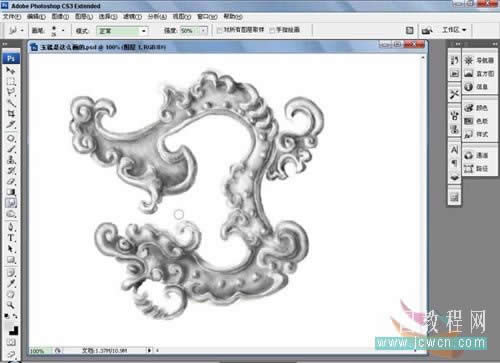
8.加上背景,设置黑色背景,使得图案显得突出,也可加上投影。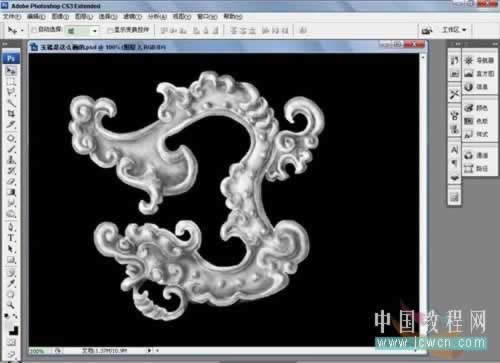
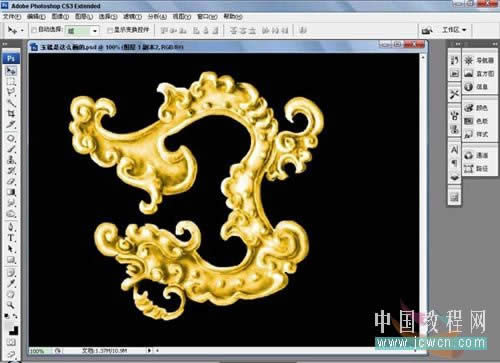
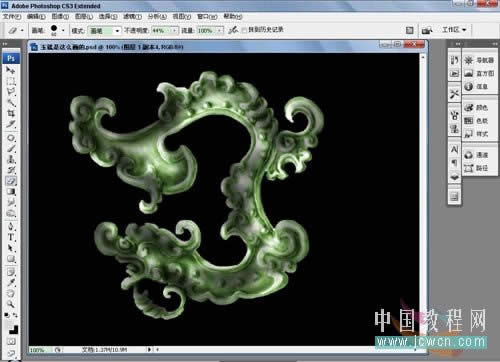
9.为图案着色,复制图案图层,按ctrl u,色相/饱和度,复制一层并隐藏,如图。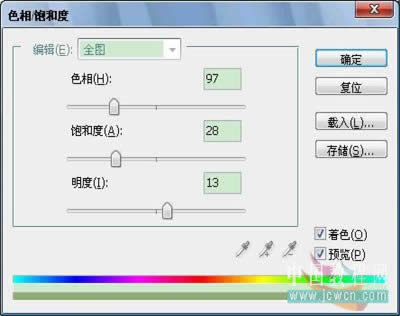
10.调整整体对比度,执行:图像-〉调整-〉亮度/对比度,如图。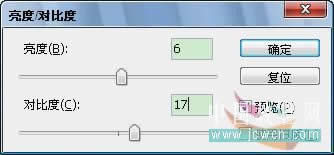
11.再次复制图案图层,然后关掉其他图层的“眼睛”将他们隐藏,在画面上适当的擦除一部分.
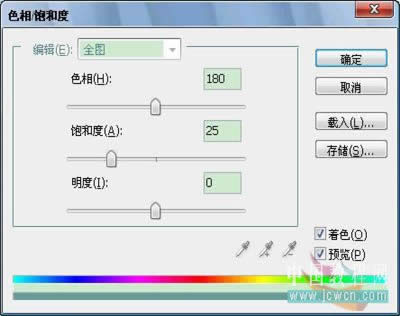
12.然后再次复制该图案图层,并隐藏其他图层,再次对图层进行着色,按ctrl u,色相/饱和度,如图.
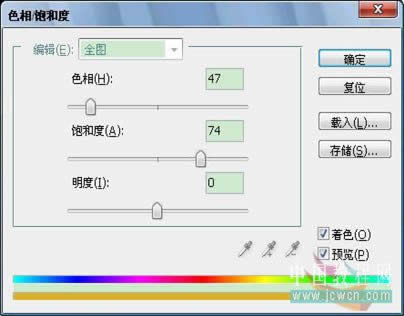
13.然后再次复制该图案图层,同样的方法在新图层上适当的擦除一部分,再次对图层进行着色,按ctrl u,色相/饱和度,如图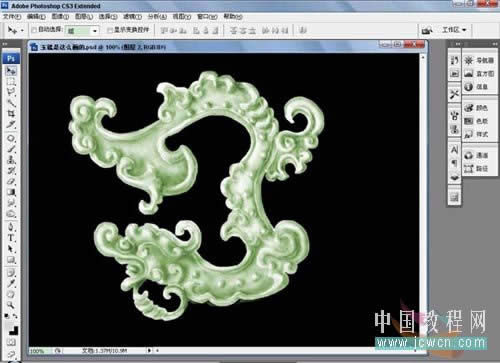

14.最后调整一下,在第九步的时候隐藏的一层放在所有图层的上面,按住ctrl,将其选取,然后执行:滤镜->模糊->高斯模糊 效果就做好了.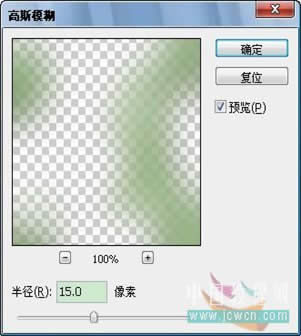 Photoshop默认保存的文件格式,可以保留所有有图层、色版、通道、蒙版、路径、未栅格化文字以及图层样式等。
关键词:Photoshop转矢量素材为一块玉