TP-Link TL-WR941N V4~V7 无线路由器上网设置 路由器
时间:2024/4/22作者:未知来源:手揣网教程人气:
- [摘要]TP-Link TL-WR941N V4~V7 无线路由器上网设置1、首先我们需要先连接路由器跟电脑,不同的入网类型计入方式也不一样,下面小编举个例子,拿电话线入户举例:猫出来的网线,连接到路由器的...
TP-Link TL-WR941N V4~V7 无线路由器上网设置

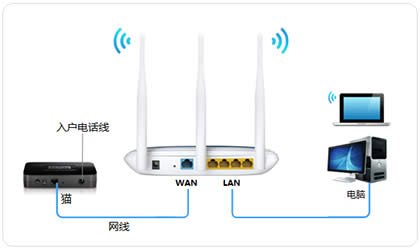
1、首先我们需要先连接路由器跟电脑,不同的入网类型计入方式也不一样,下面小编举个例子,拿电话线入户举例:猫出来的网线,连接到路由器的WAN口,再使用网线将电脑连接到路由器任意一个LAN口。如果没有足够的网线,可以通过无线方式连接到路由器。
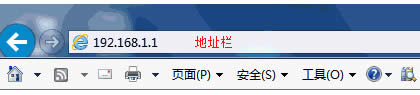
2、打开浏览器,清空地址栏并输入:192.168.1.1,回车。登录管理界面需要输入用户名和密码,默认均为admin,点击 确定。
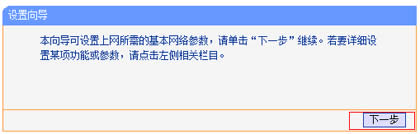
3、进入管理界面后,点击下一步,开始设置向导。
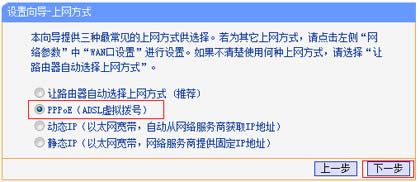
4、在上网方式中选择PPPoE(ADSL虚拟拨号)(具体上网方式根据自己的入户类型进行选择)。
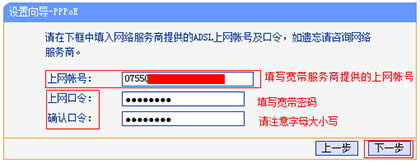
5、在上网帐号中输入宽带运营商提供的宽带帐号,上网口令中输入宽带密码。
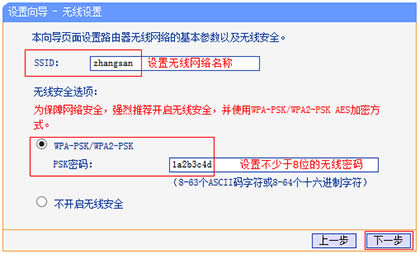
6、在SSID中设置无线网络名称,在PSK密码中设置不小于8位的无线密码。
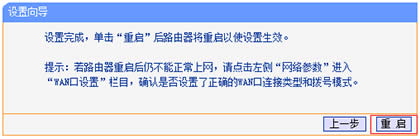
7、点击 重启,路由器设置成功。重启完成后,电脑仅需要连接路由器LAN口或无线网络,无需任何设置即可上网。
 TP-LINK无线路由采用UFO幽浮外观,造型时尚;信号灵敏、界面友好、功能强大、安全放心。它性价比很高,适合家庭、学生、商务人士使用。
关键词:TP-Link TL-WR941N V4~V7 无线路由器上网设置 路由器