腾达 G3 V2 无线路由器设置WEB认证图文使用教程 路由器
时间:2024/9/11作者:未知来源:手揣网教程人气:
- [摘要]腾达 G3 V2 无线路由器设置WEB认证教程第一步: 连接线路从外网接一条网线进来到路由器WAN口上,再从路由器上面LAN口分出一条网线到电脑上,完成后在浏览器输入登录IP地址进入管理设置界面。第...
腾达 G3 V2 无线路由器设置WEB认证教程
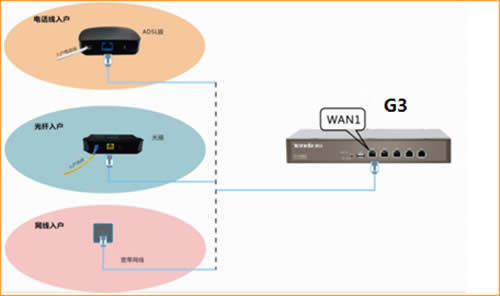
第一步: 连接线路
从外网接一条网线进来到路由器WAN口上,再从路由器上面LAN口分出一条网线到电脑上,完成后在浏览器输入登录IP地址进入管理设置界面。
第二步:进入设置认证界面
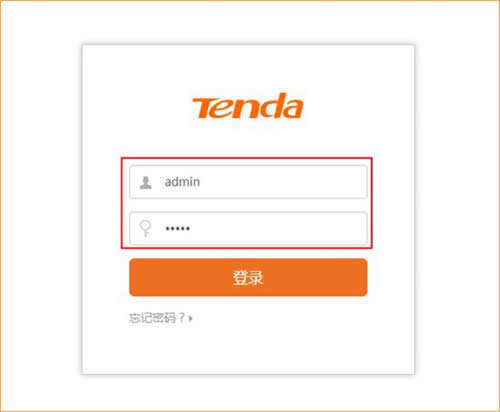
在浏览器地址栏输入192.168.0.252,输入默认账号和密码:admin后可以进入到路由器的设置界面。

进入界面后选择“WEB认证”,通过“基本设置”可以设置web认证。
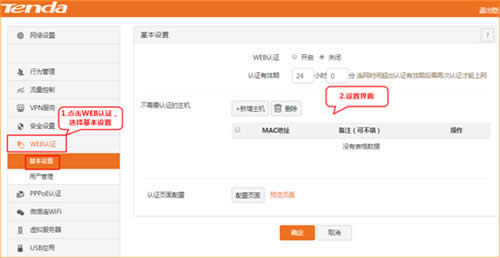
第三步:认证基础设置
1、认证基础设置,首先“开启web认证”,然后“设置无流量重新登录的时间”和“认证页面的配置”,可以通过“新增主机”来设置免认证的主机,设置完成后点击“确定”保存。
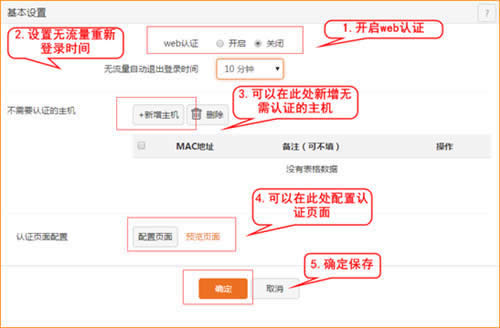
2、新增不受限制主机设置,填写主机的“MAC地址”,修改“备注”点击“添加”并“确定”

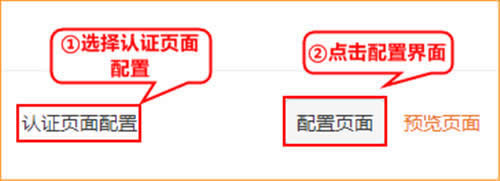
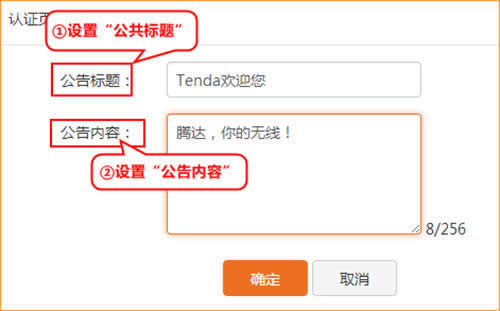
3、认证界面设置,选择“认证页面配置”,点击“配置页面”。设置“公共标题”,“公告内容”
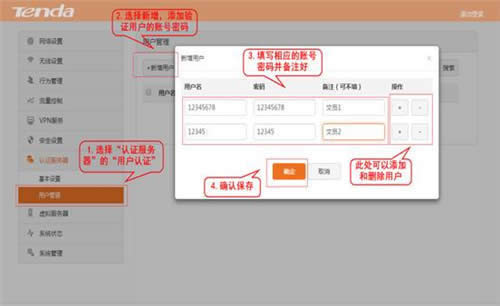
第四步:添加认证用户的账号和密码
认证的账号密码在“WEB认证”-“用户管理”-“添加用户”里面设置,设置好用户名和密码后,点击“确定”保存。
第五步:打开网页,输入认证的用户名和密码认证上网。
用浏览器打开任意一个网页,会跳转到WEB认证页面
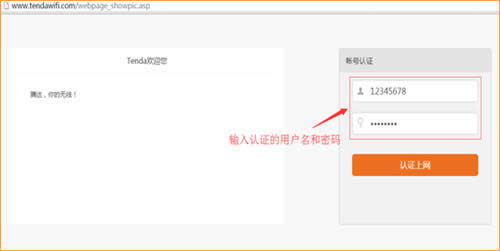
在红色框内输入账号和密码后,点击“认证上网”按钮即可上网。
 “自强不息、勇于创新、诚实守信” 是腾达公司的企业精神, “超强价值、卓越品质、专业服务”是腾达公司的服务理念,腾达人将以此为信念,用对社会、对用户高度负责的态度,实现世界一流高科技企业的目标。
关键词:腾达 G3 V2 无线路由器设置WEB认证图文详细教程 路由器