Photoshop调出蓝色水灵阿宝色美女照片
时间:2024/7/12作者:未知来源:手揣网教程人气:
- [摘要]基于很多人喜欢这种色调,我之前从上网查找教程和自己的运用,做出这种冷色调风格的蓝阿宝色,其实原理很简单,我讲下思路,复制一层,自动色阶,盖印图层,转到Lab模式,复制一层,全选,复制A通道,粘贴到B...
基于很多人喜欢这种色调,我之前从上网查找教程和自己的运用,做出这种冷色调风格的蓝阿宝色,其实原理很简单,我讲下思路,复制一层,自动色阶,盖印图层,转到Lab模式,复制一层,全选,复制A通道,粘贴到B通道,稍微拉低A通道曲线,盖印图层,转到RGB模式,复制一层,调整,阀值132,高斯模糊8,3 图层混合模式柔光,不透明度20%盖印图层,拉高RGB曲线,完成
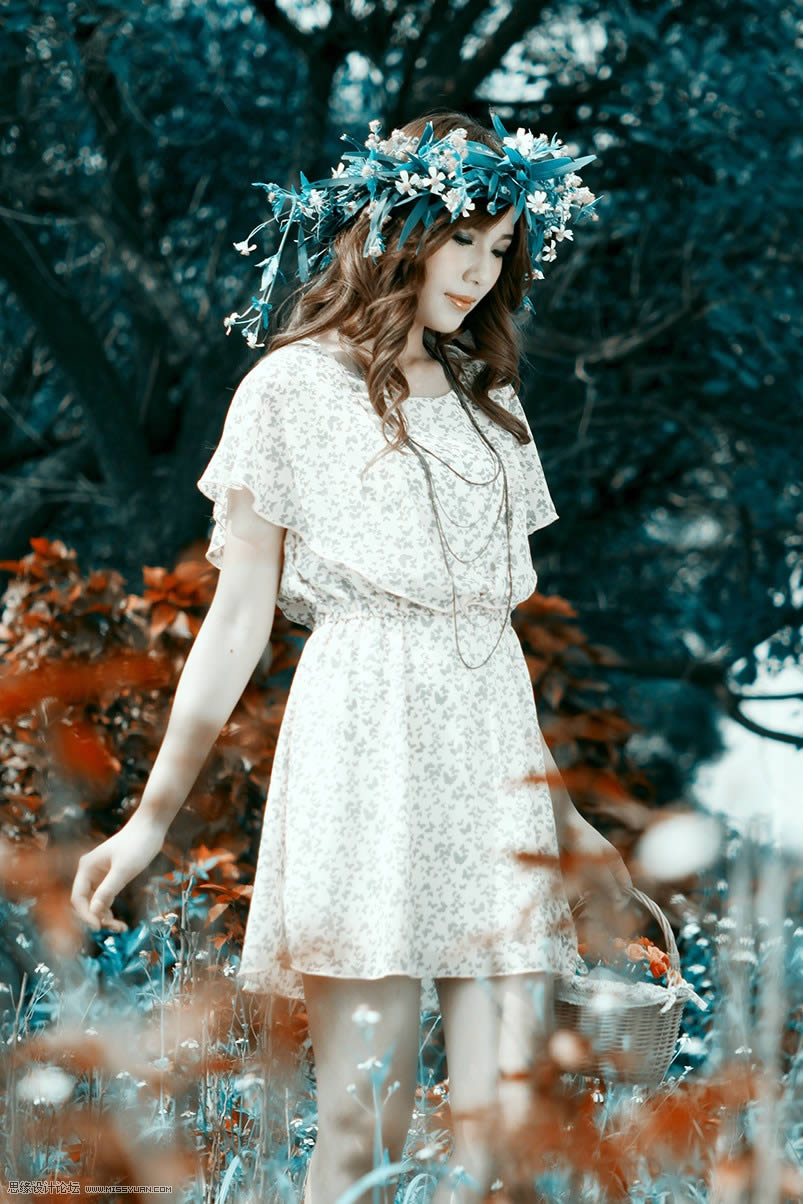
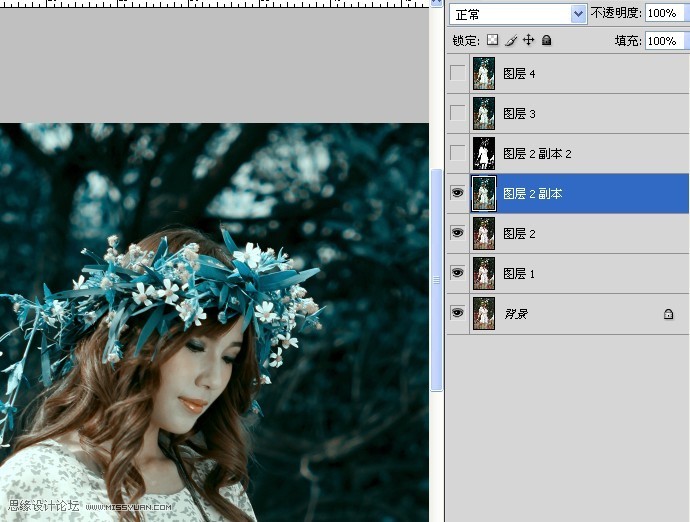
效果图:
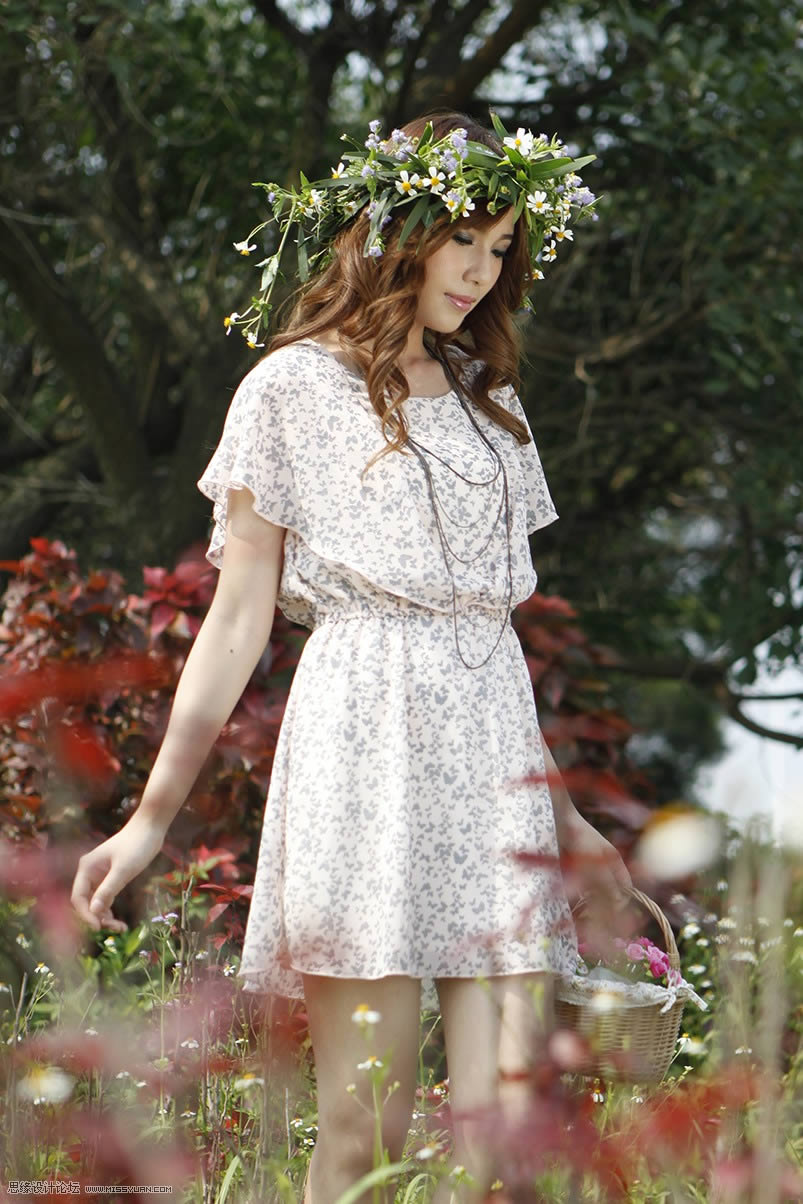
原图:
1.打开图片,复制一层 ctrl+j 自动色阶ctrl+shift+L
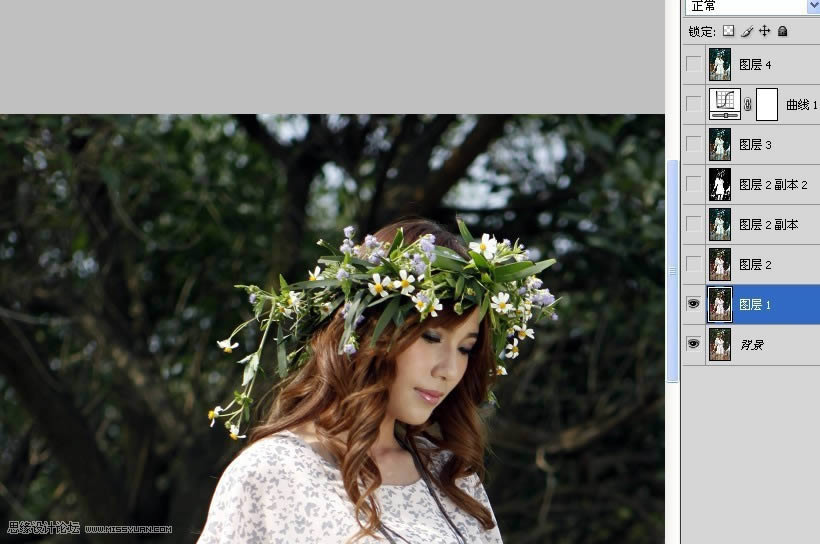
2.盖印图层ctrl+shift+alt+E
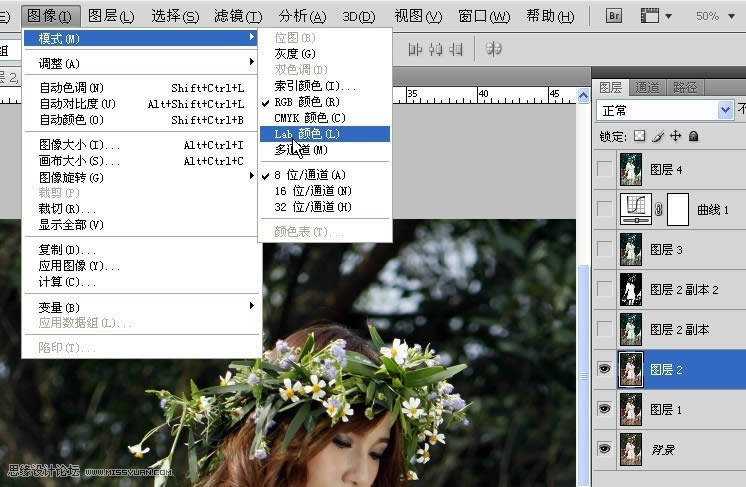
3.图像,模式,lab模式,不合并(alt+I )(M)(L)(D)
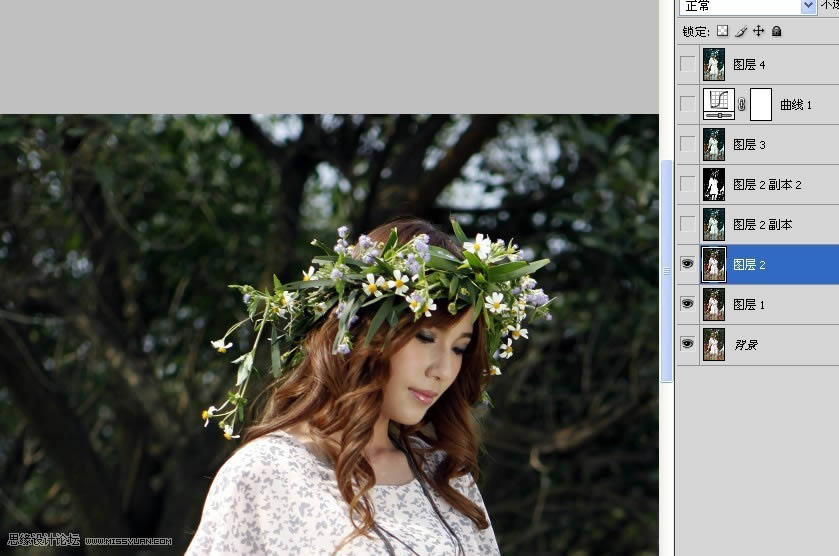
4.全选A通道,(ctrl+A)复制(ctrl+C)
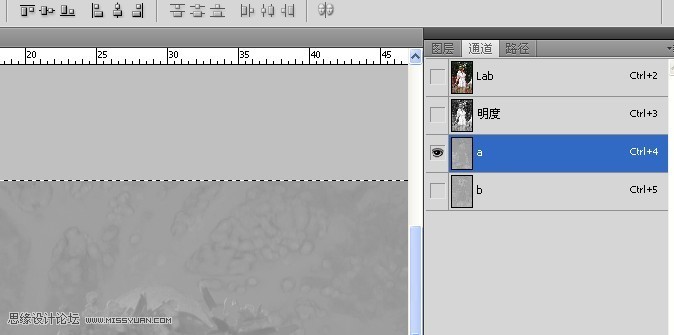
粘贴到B通道,(ctrl+V)
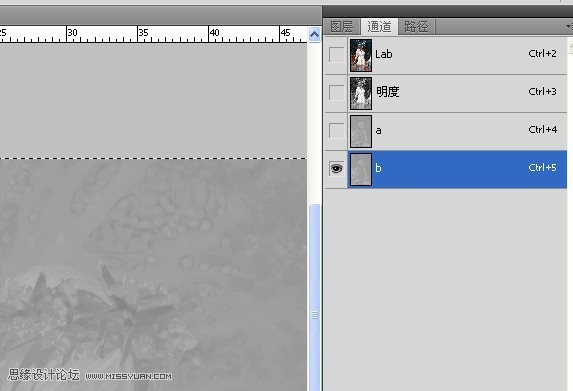
拉低A通道曲线(ctrl+M)

输入3,输出-5(数据最好不要相差太大)盖印图层ctrl+shift+alt+E(有时需要改变图层不透明度,可能太蓝)然后就得到这样的效果,如果不是这样的,请检查自己的步骤
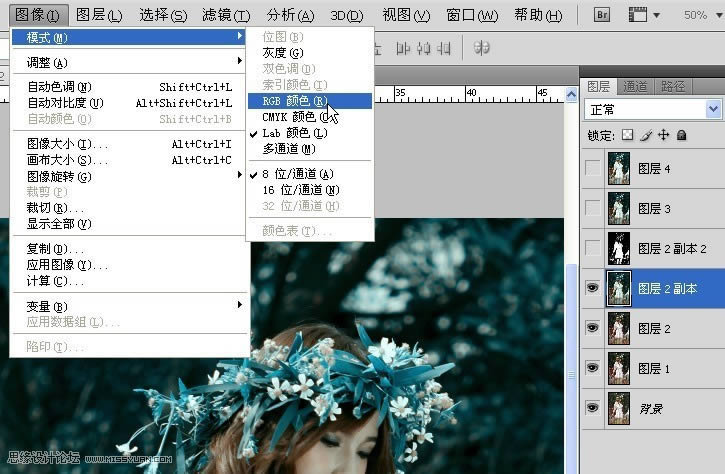
图像,模式,RGB模式,不合并(alt+I)(M)(R)(D)
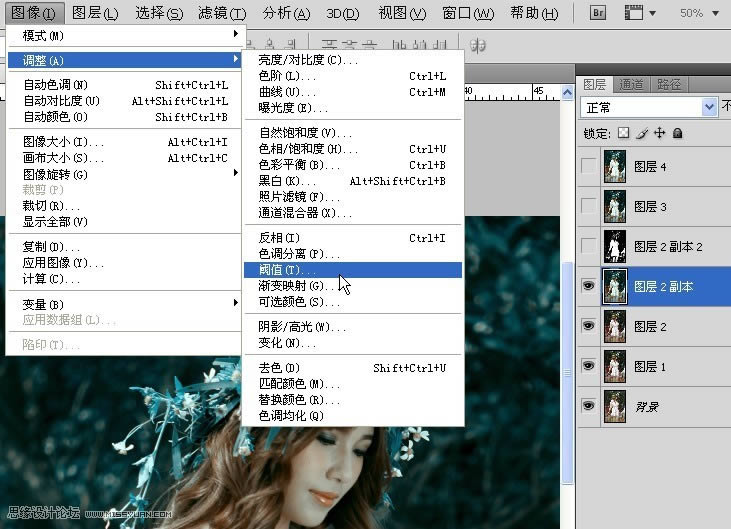
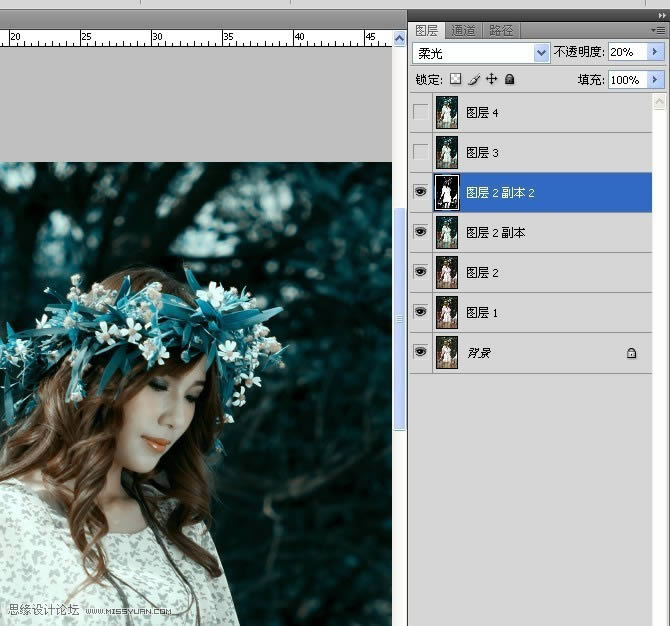
复制一层ctrl+J,图像,调整,阀值132(ail+I)(A)(T)
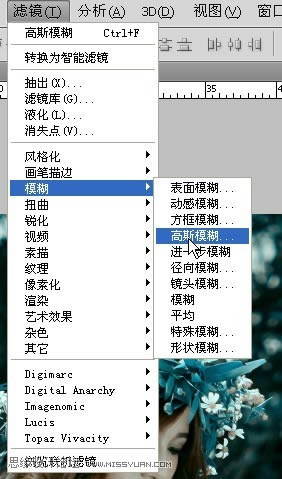
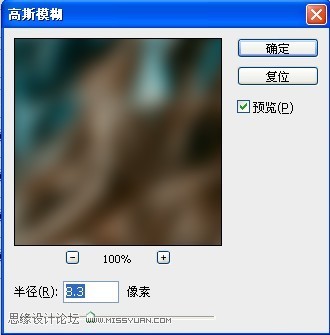
滤镜,模糊,高斯模糊8,3
图层混合模式柔光,(原教程是叠加,不过叠加效果我觉得不够柔光好)不透明度20% 不透明度有时要根据图而改变,
然后拉高RGB曲线,大约是145,111左右(自己根据图而定)
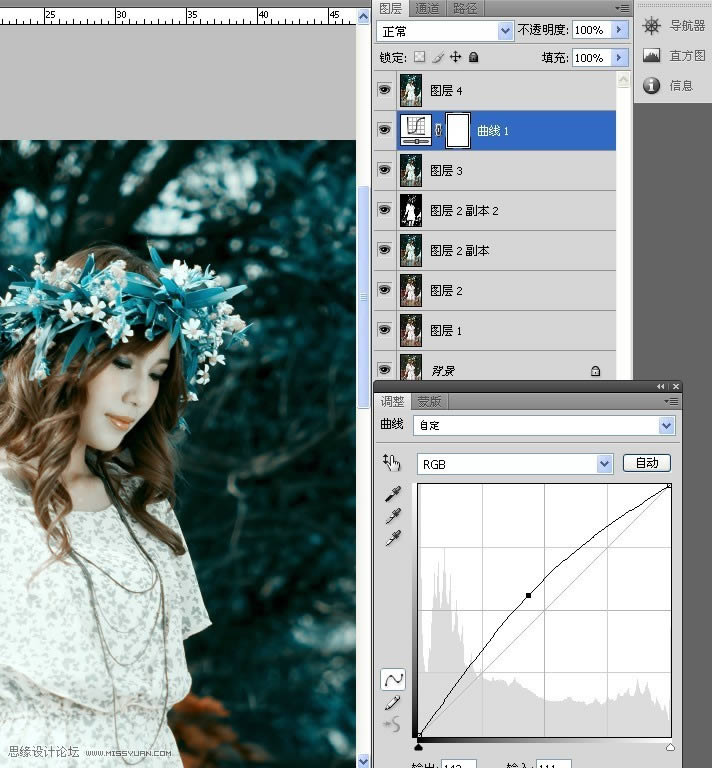
盖印图层ctrl+shift+alt+E完成
效果图:
Photoshop默认保存的文件格式,可以保留所有有图层、色版、通道、蒙版、路径、未栅格化文字以及图层样式等。
关键词:Photoshop调出蓝色水灵阿宝色美女照片