学习Bootstrap后的一些小总结
时间:2024/10/24作者:未知来源:手揣网教程人气:
- [摘要]本章给大家带来学习Bootstrap后的一点小总结,让大家可以知道Bootstrap的组成、Bootstrap 的优缺点、Bootstrap 如何实现响应式布局(示例)。有一定的参考价值,有需要的朋...本章给大家带来学习Bootstrap后的一点小总结,让大家可以知道Bootstrap的组成、Bootstrap 的优缺点、Bootstrap 如何实现响应式布局(示例)。有一定的参考价值,有需要的朋友可以参考一下,希望对你有所帮助。
【相关视频推荐:Bootstrap教程】
Bootstrap4特点:1.兼容IE10+ 2.使用flexbox 布局 3.抛弃Nomalize.css 4.提供布局和 reboot 版本
Bootstrap组成:1.基础样式 2.常用组件 3.JS插件
常见问题:
1.Bootstrap 的优缺点
优点:CSS 代码结构合理 ,现成的样式可以直接用
缺点:定制较为繁琐,体积大
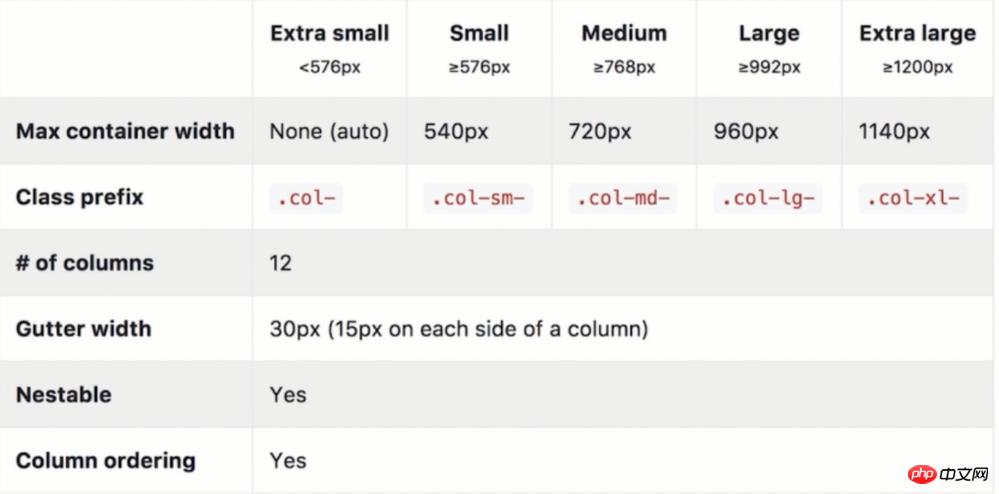
2.Bootstrap 如何实现响应式布局
原理:通过 media query 设置不同分辨率的class
使用:为不同分辨率选择不同的网格class
3.如何基于 Bootstrap 定制自己的样式
1.使用 css 同名类覆盖(简单场景使用)
2.修改源码重新构建
3.引用 scss 源文件,修改变量
知识点:
1.基本用法
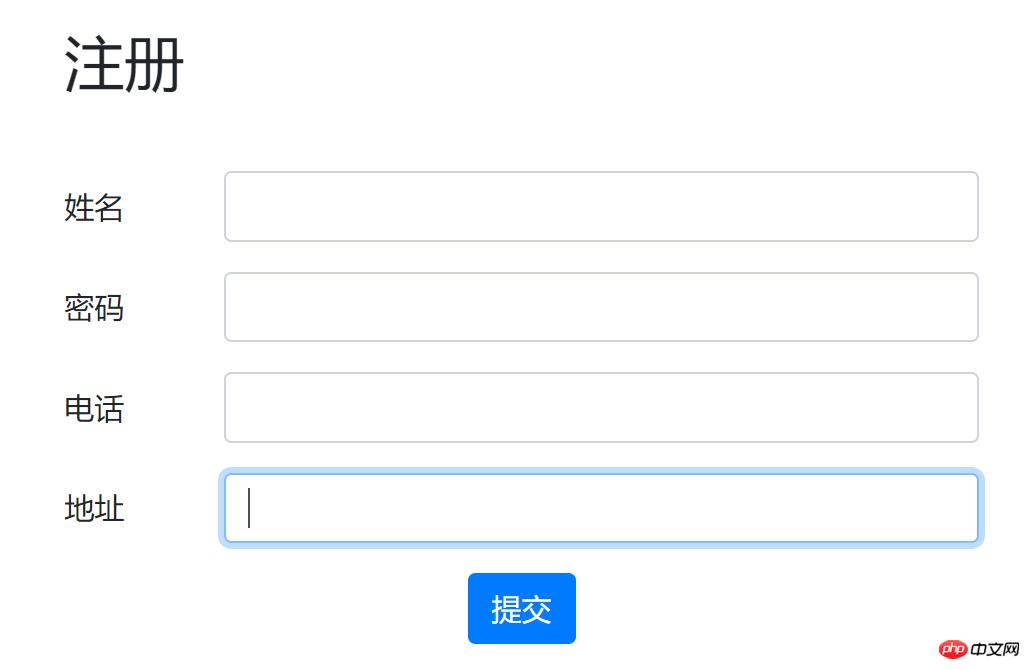
制作简单登录页面
<!DOCTYPE html>
<html>
<head>
    <meta charset="UTF-8">
    <meta name="viewport" content="width=device-width, initial-scale=1.0">
    <meta http-equiv="X-UA-Compatible" content="ie=edge">
    <link rel="stylesheet" href="bootstrap/css/bootstrap.css">
    <title>Bootstrap</title>
    <style>
        #result{
            display: none;
        }
        .title{
            margin-top: 50px;
            margin-bottom: 50px;
        }
        .operate button{
            margin: 0 auto;
        }
    </style>
</head>
<body>
    <h2 class="title col-6 offset-3">注册</h1>
    <form id="myForm" class="col-6 offset-3">
        <div class="form-group row">
            <label class="col-2 col-form-label">姓名</label>
            <div>
                <input name="name" type="text" />
            </div>
        </div>
        <div class="form-group row">
            <label class="col-2 col-form-label">密码</label>
            <div>
                <input name="password" type="password" />
            </div>
        </div>
        <div class="form-group row">
            <label class="col-2 col-form-label">电话</label>
            <div>
                <input name="cellphone" type="text" />
            </div>
        </div>
        <div class="form-group row">
            <label class="col-2 col-form-label">地址</label>
            <div>
                <input name="address" type="text" />
            </div>
        </div>
        <div id="result" class="alert alert-danger">

        </div>
        <div class="operate form-group row">
            <button class="btn btn-primary" type="submit">提交</button>
        </div>
    </form>
    <script>
        var form = document.querySelector('#myForm');
        var result = document.querySelector('#result');
        form.addEventListener('submit', function(e){
            if(!document.querySelector('[name=password]').value){
                result.style.display = 'block';
                result.innerHTML = '密码为空';
            }else{
                result.style.display = 'none';
            }
            e.preventDefault();
        });
    </script>
</body>
</html>
效果图:
2.Bootstrap JS 组件
基于 jQuery 写的,可以完成很多交互效果,所以需要引入 jQuery ,还需要引入 Popper.js (库)和 bootstrap.js
使用方式:1.基于 HTML 的 data-** 属性 2.基于 JS API
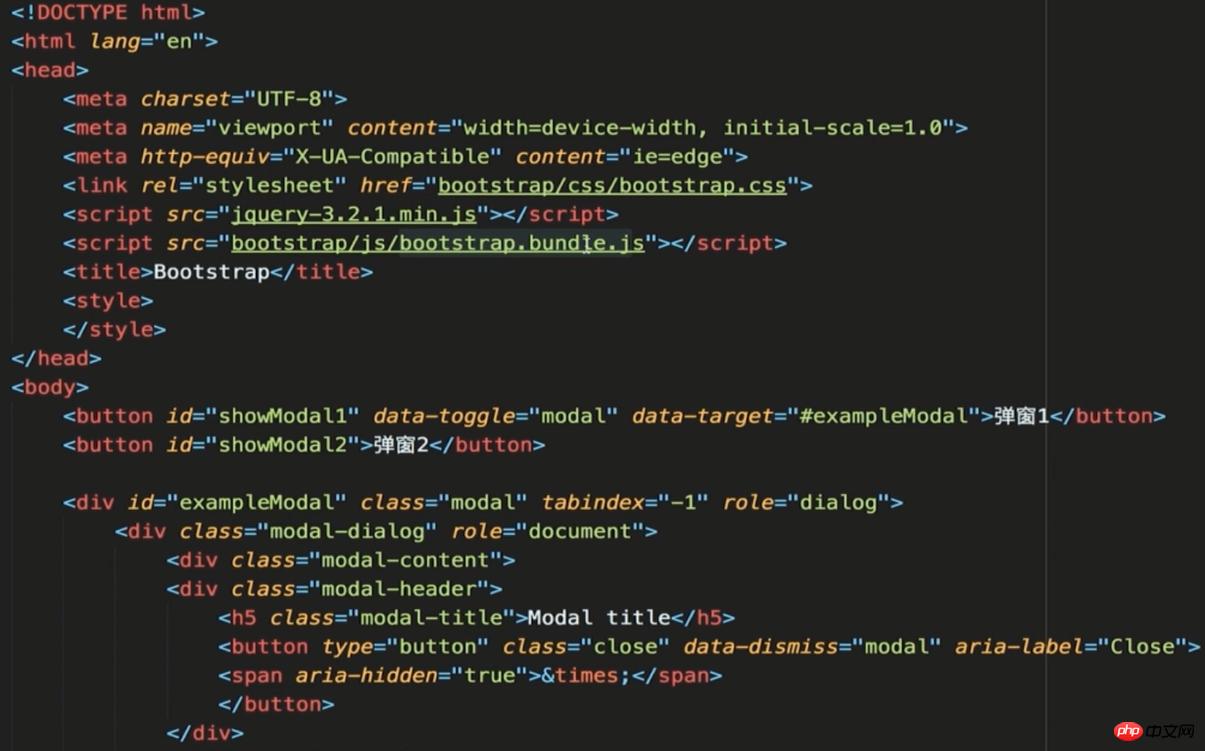
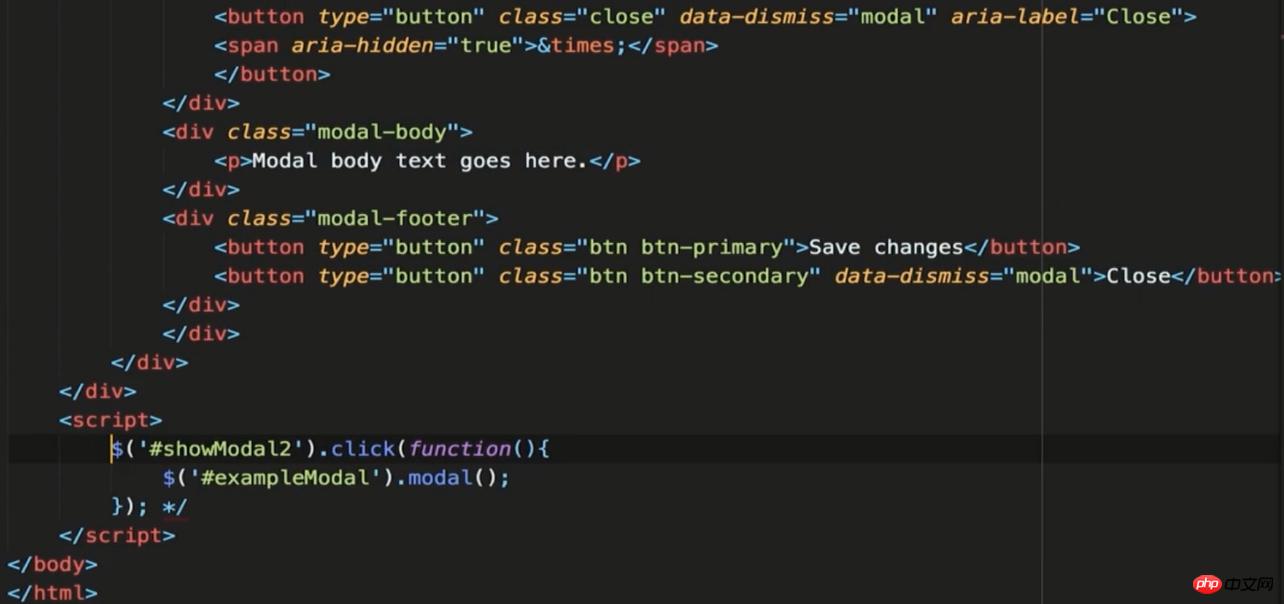
效果图:

3.Bootstrap 响应式布局
代码示例:
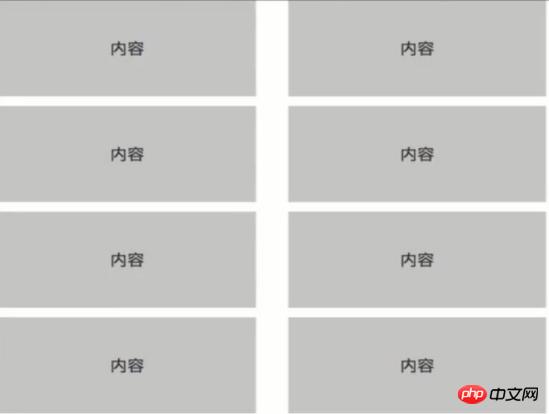
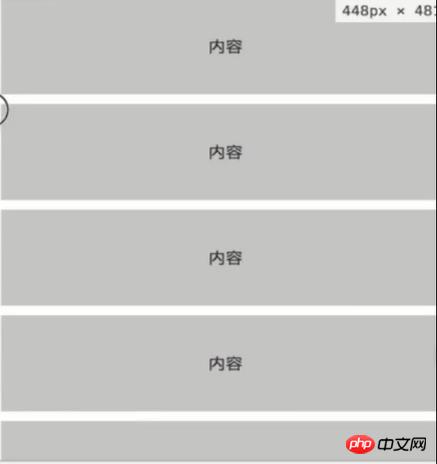
<!DOCTYPE html> <html> <head> <meta charset="UTF-8"> <meta name="viewport" content="width=device-width, initial-scale=1.0"> <meta http-equiv="X-UA-Compatible" content="ie=edge"> <link rel="stylesheet" href="bootstrap/css/bootstrap.css"> <title>Bootstrap</title> <style> .content > div{ height: 100px; line-height: 100px; text-align: center; color: #333; background:#cccccc; margin-bottom: 10px; } </style> </head> <body> <div> <div> <div class="content col-12 col-lg-3 col-md-4 col-sm-6"><div>内容</div></div> <div class="content col-12 col-lg-3 col-md-4 col-sm-6"><div>内容</div></div> <div class="content col-12 col-lg-3 col-md-4 col-sm-6"><div>内容</div></div> <div class="content col-12 col-lg-3 col-md-4 col-sm-6"><div>内容</div></div> <div class="content col-12 col-lg-3 col-md-4 col-sm-6"><div>内容</div></div> <div class="content col-12 col-lg-3 col-md-4 col-sm-6"><div>内容</div></div> <div class="content col-12 col-lg-3 col-md-4 col-sm-6"><div>内容</div></div> <div class="content col-12 col-lg-3 col-md-4 col-sm-6"><div>内容</div></div> </div> </div> </body> </html>总共12个,屏幕尺寸 < 576px时,每行12个;768px>=屏幕尺寸>=576px时,每行6个;992px>=屏幕尺寸>=768px时,每行4个;屏幕尺寸>=992px时,为每行3个;
效果图:

4.Bootstrap 定制方法
方法:1.使用 css 同名类覆盖(简单场景使用) 2.修改源码重新构建 3.引用 scss 源文件,修改变量
以上就是学习Bootstrap后的一点小总结的详细内容,更多请关注php中文网其它相关文章!
网站建设是一个广义的术语,涵盖了许多不同的技能和学科中所使用的生产和维护的网站。
关键词:学习Bootstrap后的一些小总结